Uncategorized files
Jump to navigation
Jump to search
Showing below up to 100 results in range #1 to #100.
View (previous 100 | next 100) (20 | 50 | 100 | 250 | 500)
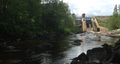
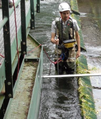
 11 Upstream-part-of-fishway-in-Guma-dam.jpg 2,560 × 1,920; 2.3 MB
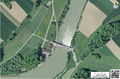
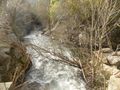
 1 Guma-dam-in-spring.jpg 1,271 × 1,195; 452 KB
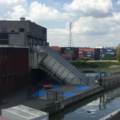
 2 Top-view-of-Guma-fishway.jpg 1,920 × 1,080; 428 KB
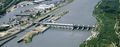
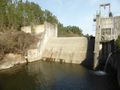
 3 Top-view-of-Guma-hydropower-the-reservoir-and-the-fishway.jpg 1,920 × 1,080; 351 KB
 3d Sensorless ultrasound setup.png 597 × 657; 918 KB
 3d Sensorless ultrasound setup square.png 206 × 206; 80 KB
 3d fish tracking 3d ouput.jpg 1,346 × 1,094; 219 KB
 3d fish tracking equipment.jpg 1,387 × 514; 154 KB
 3d fish tracking fish tracks.jpg 1,305 × 711; 134 KB
 3d fish tracking installation1.jpg 1,772 × 1,181; 1.39 MB
 4 Vadocondes-fishway.jpg 780 × 1,040; 965 KB
 5 Bottom-part-of-Vadocondes-fishway.jpg 1,040 × 780; 98 KB
 ABM results 1.png 405 × 259; 239 KB
 ABM results 2.png 607 × 412; 445 KB
 Adcp example units.png 1,198 × 521; 450 KB
 Adcp output.png 1,283 × 959; 1.94 MB
 Adcp qboat.png 486 × 364; 382 KB
 Adcp workflow.png 3,779 × 1,653; 1.29 MB
 Adcp wse.png 731 × 312; 15 KB
 Adv down.png 449 × 806; 192 KB
 Adv main components.png 482 × 884; 416 KB
 Adv nortek probe.png 491 × 854; 181 KB
 Adv sontek probe.png 802 × 811; 453 KB
 Air bubble curtain square.png 415 × 415; 273 KB
 Altheim demo.png 1,488 × 621; 1.78 MB
 Altheim layout.png 1,500 × 1,091; 3.95 MB
 Altheim migration layout.jpg 1,002 × 697; 305 KB
 Altheim natural fishway.jpg 4,032 × 3,024; 3.59 MB
 Altheim natural fishway downstream.jpg 2,126 × 1,415; 2.25 MB
 Altheim overview.jpg 900 × 596; 213 KB
 Altheim structure 1.jpg 6,000 × 4,000; 6.41 MB
 Altheim structure 2.jpg 5,520 × 3,680; 4.97 MB
 Altheim underwater.jpg 4,640 × 3,480; 2.89 MB
 Angled rotary drum screen.png 819 × 504; 21 KB
 Anundsjö fishpass intake.jpg 4,032 × 3,024; 3.51 MB
 Anundsjö fishway.jpg 1,131 × 636; 282 KB
 Anundsjö floating migration.png 650 × 488; 769 KB
 Anundsjö layout.png 1,141 × 818; 727 KB
 Anundsjö reservoir.jpg 4,032 × 3,024; 1.84 MB
 Anundsjö spillway.jpg 2,442 × 1,305; 806 KB
 Archimedes screw belgium square.png 1,020 × 1,020; 1.47 MB
 Areal-view-HPP-Freudenau c Verbund.jpg 1,920 × 750; 358 KB
 Armored substrate.png 641 × 390; 679 KB
 Bannwil Layout.png 1,071 × 709; 1.73 MB
 Barotrauma detection unit.png 946 × 256; 197 KB
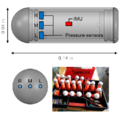 Barotrauma detection unit square.png 514 × 514; 163 KB
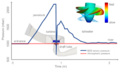 Barotrauma timeseries.png 1,290 × 757; 301 KB
 Barrier removal Norway square.png 795 × 795; 1.12 MB
 Barrier removal norway.png 1,353 × 802; 2.47 MB
 Basement 1d 2d.png 866 × 566; 354 KB
 Basement gui.png 632 × 632; 32 KB
 Basement logo.png 401 × 138; 34 KB
 Basemet qgis.png 1,579 × 1,109; 1.14 MB
 Bjorset regulated square.png 434 × 434; 40 KB
 Bms sensor.png 1,970 × 603; 943 KB
 Bms vortex tube.png 1,386 × 474; 995 KB
 Bms vortex tube2.png 1,325 × 604; 1.84 MB
 Braado weir-and-river.jpg 3,264 × 2,448; 3.23 MB
 Bragado Layout1.png 1,256 × 797; 2.11 MB
 Bragado Layout2.png 1,354 × 555; 90 KB
 Bragado canal.jpg 2,448 × 3,264; 2.47 MB
 Bragado fish survey.jpg 3,000 × 2,250; 4.52 MB
 Bragado low flow.jpg 3,000 × 2,250; 5.61 MB
 Bragado powerhouse-and-penstock.jpg 1,502 × 994; 266 KB
 Bragado river-Avelames-downstream-the-powerhouse.jpg 1,500 × 1,125; 2.29 MB
 Bragado weir.jpg 1,500 × 1,125; 1.55 MB
 Building block method.png 1,145 × 606; 95 KB
 CBR schematic.jpg 4,252 × 1,700; 550 KB
 COSH parameters.JPG 1,075 × 671; 108 KB
 COSH peak3.jpg 960 × 886; 210 KB
 COSH peaks.png 1,194 × 444; 59 KB
 COSH peaks2.png 1,190 × 436; 85 KB
 COSH peaks3.png 920 × 670; 370 KB
 Case locations.png 419 × 485; 112 KB
 Casimir fish.png 1,329 × 696; 745 KB
 Casimir gui.jpg 1,185 × 883; 335 KB
 Casimir hydropeaking.png 1,426 × 596; 486 KB
 Casimir interface.png 1,330 × 1,041; 415 KB
 Casimir migration.png 1,214 × 628; 427 KB
 Cassiopee baffle fishway.png 1,212 × 1,010; 534 KB
 Cassiopee las rives.png 1,042 × 827; 909 KB
 Classical bottom intake.jpg 794 × 1,059; 281 KB
 Classification table.xlsx ; 18 KB
 Cleaning substrate ripper.png 573 × 308; 464 KB
 Coanda schematic.png 673 × 702; 172 KB
 Coanda screen byro.png 452 × 926; 466 KB
 Coanda screen byro square.png 404 × 404; 338 KB
 Cosh tool light.png 581 × 401; 186 KB
 Cosh tool lundesoka.png 768 × 402; 745 KB
 Cosh tool parameters.png 637 × 612; 26 KB
 Cosh tool peaks day.png 1,032 × 379; 64 KB
 Cosh tool peaks hour.png 936 × 357; 43 KB
 Crushed bds tube.jpg 1,387 × 925; 503 KB
 Current meter operator.png 383 × 453; 423 KB
 Current meter section.png 876 × 544; 19 KB
 Current meter types.png 1,075 × 324; 166 KB
 Curved bar rack 3d.png 1,176 × 1,176; 2.28 MB
 Cy3igs5iu1w5taj2qsemv5wzsowmcjv.jpg 393 × 393; 97 KB
 DSS flow.png 573 × 828; 223 KB
 DSS flow web.jpg 2,046 × 1,092; 277 KB


